
Taking on a fixer-upper property presents both an exciting financial opportunity and a formidable practical challenge for real estate buyers. Properties that require substantial physical work often hold hidden equity, yet turning a run-down house into a comfortable residence requires a disciplined strategy. Without a structured plan, property owners frequently jump between unrelated projects, burning through their savings before completing major essential tasks. Succeeding with a full restoration involves understanding how every physical system in a building interacts with the rest.
A successful property transformation relies on clear prioritization from the start. Homeowners often feel tempted to begin with visible cosmetic updates like paint colors, modern light fixtures, or decorative hardware. However, spending thousands on surface finishes while ignoring a leaky roof or a sagging subfloor leads to wasted capital. Structural repairs and weatherization must always come before interior cosmetic work. Protecting the structure keeps fresh drywall dry and ensures expensive updates retain their value over many years.
By breaking down a major project into distinct sequential phases, buyers can maintain firm control over both their schedules and budgets. Sequencing tasks correctly allows work crews to operate efficiently without stepping on each other’s toes. Electrically heavy tasks and plumbing rough-ins must happen before insulation, which in turn precedes surface installations. This logical approach prevents trade professionals from tearing down fresh walls to access hidden wiring or piping later on.
Understanding the mechanics of comprehensive home remodeling helps investors and families make informed financial choices. Each phase of a restoration project requires specific technical skills, precise material choices, and balanced budgeting. When property owners approach a project with realistic expectations and a systematic mindset, they can navigate unexpected restoration hurdles with ease and confidence.
Properly sequencing trade contractors prevents costly rework. When property owners respect the logical order of home upgrades, they avoid common financial pitfalls that derail ambitious restoration projects.
Step 1: Conducting a Rigorous Structural and Moisture Audit
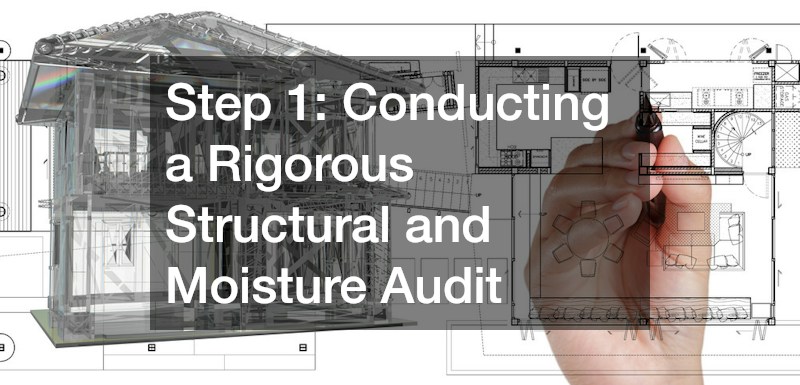
Before tearing out walls or purchasing building supplies, property owners must perform a thorough assessment of the existing structure. Hiring a licensed building inspector provides an objective evaluation of foundational integrity, electrical panel capacity, plumbing conditions, and roof systems. Uncovering hidden defects early in the project timeline prevents mid-project budget collapses and keeps workers safe.
A primary area of concern during any initial site review involves water management around the foundation perimeter. Standing water near basement walls or crawlspaces leads to expensive soil shifting, timber decay, and mold development. Inspecting downspouts, fascia boards, and roof valleys helps identify where moisture collects during heavy downpours. Installing protective accessories like gutter covers prevents leaves and organic debris from blocking water channels, allowing heavy rainwater to flow safely away from the house foundation.
In addition to drainage, the structural framing demands careful physical examination. Support beams, floor joists, rim joists, and load-bearing studs should show no signs of rot, termite damage, or severe sagging. Addressing structural deficits early guarantees that future decorative updates sit on a stable, level foundation. Skipping this initial structural evaluation often results in cracked floor tiles or misaligned door frames later in the renovation timeline.
Evaluating utility panels and internal plumbing runs also dictates early budgeting priorities. Older homes frequently feature outdated knob-and-tube wiring, aluminum connections, or galvanized iron pipes that lack necessary capacity for modern appliances. Upgrading electric service panels and replacing corroded pipes during the initial teardown phase ensures that all behind-the-wall systems meet current building codes before walls close.
Step 2: Weatherproofing the Exterior Shell and Wall Assembly
Once foundation stability and drainage systems prove secure, attention must turn directly to sealing the exterior shell. A building envelope that leaks air or water will undermine interior improvements, ruin fresh drywall, and raise monthly heating and cooling costs. Replacing compromised siding, sealing framing gaps, and repairing worn roof shingles form the primary defense against harsh weather elements.
Drafty or rotting window frames represent a major source of thermal energy loss in aged residences. Partnering with an established window and door company allows homeowners to select modern energy-efficient frames and insulated glass units. Installing double-pane low-emissivity glass significantly reduces thermal transfer while improving indoor sound insulation. Weatherproof exterior doors with tight threshold seals further lock out moisture, drafty breezes, and unwanted pests.
Proper installation practices matter just as much as purchasing high-grade exterior materials. Metal flashings must be layered correctly around framing openings to prevent wind-driven rain from penetrating behind exterior wall claddings. Professional installers ensure that every exterior seal remains airtight while preserving proper ventilation channels within exterior wall cavities to prevent hidden condensation buildup.
Securing the building shell also boosts exterior security and curbside aesthetic appeal. Modern entry door assemblies offer multi-point locking mechanisms that strengthen access points against forced entry. Meanwhile, fresh energy-rated windows give older building facades a clean, updated appearance that increases official appraisal values before interior trade work even begins.
Step 3: Restoring Structural Timber and Outdoor Decks

Outdoor elevated structures and attached porches require careful structural evaluations before occupants begin using them for recreation. Exposure to rain, direct sunlight, and fluctuating freeze-thaw cycles weakens wooden support posts, floor joists, and railing connections over time. Safety should always take top priority when evaluating outdoor gathering spaces for family members and visiting guests.
Rotted deck boards, rusted ledger fasteners, and loose railing posts create immediate safety hazards for families and guests. Timely deck repairs address underlying ledger board connections, joist hangers, and damaged floor planking before dangerous structural failures occur. Replacing rusted fasteners with stainless steel or hot-dipped galvanized hardware ensures long-term stability against high winds and heavy structural weight loads.
Choosing appropriate replacement materials for deck updates depends heavily on long-term maintenance preferences. While pressure-treated lumber offers an economical upfront option, modern composite decking materials resist rot, splintering, and fading without requiring annual staining or sealing. Property owners should evaluate local climate conditions and long-term maintenance commitment when selecting replacement materials for their outdoor living areas.
Integrating proper drainage solutions underneath elevated outdoor platforms protects ground-level spaces from water accumulation. Sloping ground surfaces away from support footings prevents wood rot around concrete piers. Maintaining sturdy, well-engineered outdoor platforms extends the usable living area of a property well beyond the interior floor plan.
Step 4: Upgrading Interior Subfloors and Surface Coverings
With the building shell secure and exterior structures inspected, attention shifts indoors to high-traffic floor surfaces. Subfloor conditions dictate the ultimate success or failure of any new floor covering. Creaking plywood panels, moisture damage, or uneven subfloor joists must be leveled, reinforced, and repaired before laying final surface materials across living areas.
Selecting appropriate floor coverings depends on the specific daily function of each room. High-moisture areas require non-porous materials like luxury vinyl plank or porcelain tile, while living rooms often benefit from warm, solid hardwood surfaces. Partnering with a skilled flooring service ensures subfloors receive proper leveling compounds, underlayment padding, and precise laying techniques that prevent squeaks and buckled boards.
Proper underlayment selection reduces sound transmission between building levels and provides comfortable underfoot cushioning. In multi-story restorations, acoustic underlayment membranes prevent footstep noises from echoing into lower rooms. Additionally, installing vapor barriers over concrete foundation slabs prevents ground moisture from warping hardwood planks or loosening tile adhesive bonds over time.
Flow and consistency across open floor plans visually expand interior living spaces. Continuing identical or complementary floor materials through hallways, living rooms, and open dining areas creates a cohesive look throughout the entire property. Professional floor installers also manage transition strips smoothly between different room functions, eliminating tripping hazards at room doorways.
Step 5: Modernizing Kitchen Layouts and Functional Workspaces
The kitchen serves as the primary functional hub of most residences, making its physical layout crucial to everyday comfort. Older homes often feature closed-off, cramped cooking spaces that isolate home cooks from family members and guests. Removing non-load-bearing walls creates open floor plans that improve traffic movement and bring natural light deeper into the home.
Planning a successful kitchen remodeling project requires careful attention to the classic work triangle between the refrigerator, sink, and cooktop. Cabinetry placement should maximize usable vertical wall storage while allowing ample room for drawer openings and appliance door clearances. Dedicated task lighting installed under upper cabinets eliminates dark prep zones across working counter spaces.
Storage solutions play a central role in maintaining an organized, functional kitchen environment. Soft-close drawers, full-extension pull-out pantry shelves, and deep pot drawers optimize available cabinet interior volume. Integrating pull-out trash recycling centers and dedicated appliance garages keeps everyday counter surfaces clutter-free and visually clean for daily cooking activities.
Mechanical infrastructure must align perfectly with new kitchen layouts. Updating electrical circuits accommodates high-draw modern appliances like induction cooktops, wall ovens, and built-in microwave drawers. Dedicated plumbing lines for ice makers, dishwasher units, and secondary prep sinks ensure the kitchen space handles modern cooking demands effortlessly.
Step 6: Installing Durable Counters and Transforming Bathrooms
Surfaces in food preparation zones endure heavy daily use, requiring durable materials that balance utility with visual style. Countertop selection impacts both daily cleaning routines and overall interior design aesthetics. Property owners must weigh heat resistance, stain susceptibility, and routine sealing requirements when choosing surface materials for meal prep work.
Installing custom counters crafted from quartz, granite, or quartzite offers long-lasting durability against hot pans, sharp knives, and moisture exposure. Engineered quartz provides a non-porous surface that resists bacterial growth without requiring periodic chemical sealers. Precision fabrication ensures seamless edges, clean cutout openings for undermount sinks, and exact alignment along wall tile backsplashes.
Simultaneously, attention turns toward updating functional hygiene spaces across the floor plan. Modernizing outdated bathroom remodels involves replacing ancient tub units, upgrading ventilation fans, and re-tiling shower enclosures. Effective exhaust systems pull excess humidity out of the room, protecting fresh wall paint and timber trim from mold accumulation.
Plumbing fixtures in updated bathrooms should combine water efficiency with reliable long-term performance. Low-flow toilets, pressure-balanced shower valves, and touchless faucets reduce water consumption without sacrificing water flow pressure. Proper waterproofing membrane installations behind shower tile backer boards guarantee that steam and water never compromise internal wall studs.
Step 7: Designing Sustainable Hardscapes and Manicured Grounds

Once major interior projects near completion, attention shifts back outdoors to enhance the surrounding grounds and pathways. Primary pathways, patio areas, and retaining walls anchor the physical landscape, defining functional zones for outdoor relaxation, cooking, and family dining.
Incorporating durable hardscaping features like stone pavers, concrete retaining blocks, and custom fire pits creates organized outdoor living spaces. Retaining walls stabilize sloping yards, preventing dangerous soil erosion around foundation perimeter lines. Interlocking paver patios offer low-maintenance entertainment zones that withstand heavy freeze-thaw weather cycles without cracking or shifting out of alignment.
Complementing stone structures with vibrant green lawns creates a balanced, inviting exterior environment. Turf health relies on consistent core aeration, proper soil pH balancing, weed management, and seasonal fertilization routines. Hiring a dedicated lawn care service ensures grass remains thick, healthy, and resilient against intense summer heat waves and seasonal pest infestations throughout the year.
Strategic outdoor landscape lighting highlights architectural features while improving nighttime safety along steps and walkways. Low-voltage LED fixtures integrated into retaining walls and pathway edges illuminate foot paths without creating harsh light glare. Well-planned landscapes raise overall property appraisal values while offering functional outdoor enjoyment for years to come.
Step 8: Managing Timelines, Budgets, and Subcontractor Contracts
Executing a whole-property restoration demands disciplined budget tracking and realistic timeline management. Unexpected structural issues, material backorders, and municipal permit delays frequently arise during multi-month construction projects. Maintaining a dedicated contingency fund of fifteen to twenty percent helps absorb surprise costs without halting ongoing trade work on site.
Working alongside licensed, insured, and experienced subcontractors ensures building work meets local building codes and safety standards. Clear contracts outlining project scopes, payment schedules, and target completion dates prevent misunderstandings between property owners and trade professionals. Regular site walk-throughs allow owners to review progress, verify work quality, and address questions promptly.
Permit acquisitions and municipal inspections form the structural backbone of lawful property transformations. Failing to pull necessary building permits can lead to costly fines, mandatory work teardowns, or legal complications during future real estate transactions. Completing official inspection sign-offs at each construction phase protects the owner’s financial investment for the long term.
A fully restored property balances modern convenience, structural efficiency, and long-term durability. By following a logical sequencing plan from foundational drainage up to final cosmetic details, property owners create safe, beautiful homes that retain high equity values for decades to come.
