
Moisture is one of the sneakiest threats to your home, working quietly behind walls, under floors, and above ceilings until the damage becomes expensive to fix. Whether it comes from a storm, a slow leak, or everyday humidity, unchecked moisture can lead to mold, rot, and structural problems that affect your family’s health and your home’s value. The good news is that most moisture damage is preventable with the right knowledge and a few proactive habits. This guide walks you through the key areas of your home where moisture tends to sneak in and what you can do about it, season after season.
Start With What’s Over Your Head
Your roof is your home’s first line of defense against rain, snow, and ice, so it deserves regular attention rather than a once-a-decade glance. Small issues like cracked flashing, missing shingles, or clogged gutters can let water seep into your attic long before you notice a stain on the ceiling. Scheduling an inspection with local roofers at least once a year, ideally before the rainy or winter season, can catch these problems while they are still cheap and easy to fix. A trained eye can spot vulnerabilities that are nearly impossible to see from the ground.
Beyond the shingles themselves, ventilation and insulation in the attic play a huge role in preventing condensation buildup. Poor airflow traps warm, moist air against the roof deck, which can cause wood rot even without an active leak. Keeping gutters clear and downspouts directed away from the foundation also reduces the amount of water pooling near your roofline.
-
Check for curling, cracked, or missing shingles after major storms
-
Clear debris from gutters at least twice a year
-
Look for daylight or water stains in the attic
-
Make sure downspouts extend several feet from the foundation
Guarding the Ground Level of Your Home
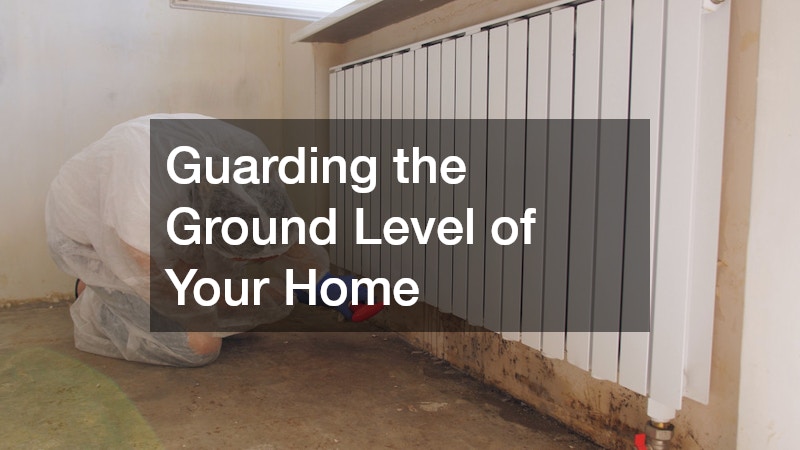
Foundations and exterior walls are constantly exposed to rain, groundwater, and seasonal freeze-thaw cycles, which can create hairline cracks that widen over time. Once water finds its way into these small openings, it can undermine the structural integrity of your home and create damp, musty basements. A qualified masonry contractor can assess brick, stone, or concrete surfaces for signs of erosion, spalling, or cracking that might otherwise go unnoticed. Catching these issues early is far less costly than dealing with a compromised foundation later.
Regular sealing and repointing of masonry joints helps keep water from penetrating porous materials like brick and mortar. It is also worth checking that the grading around your home slopes away from the foundation, since improper grading is one of the most common causes of basement moisture. A little attention to these details now can save you from major water intrusion problems down the road.
Watching for Hidden Water Loss Indoors
Not all moisture problems come from outside; plumbing issues inside your walls and under your floors are just as common and often harder to detect. A leaking pipe can go unnoticed for weeks, quietly soaking insulation, drywall, and subflooring while your water bill creeps upward. Warning signs include unexplained damp spots, a musty smell in a specific room, or a noticeable drop in water pressure. Catching a leak early can be the difference between a quick repair and a full wall replacement.
It helps to know where your main shutoff valve is located so you can act fast if a pipe bursts unexpectedly. Regularly inspecting under sinks, around water heaters, and near washing machine connections can help you spot slow leaks before they escalate. If you notice warped flooring or peeling paint near plumbing fixtures, it is worth investigating right away rather than waiting.
-
Check under sinks and around appliances monthly for dampness
-
Monitor your water bill for unexplained spikes
-
Know the location of your main water shutoff valve
-
Address discoloration on ceilings or walls immediately
Sealing Entry Points Around Doors and Windows

Doors and windows are frequent culprits when it comes to letting moisture sneak into a home, especially older units with worn weatherstripping or warped frames. Over time, gaps around these openings allow rain to seep in during storms and can even contribute to condensation buildup indoors. Upgrading to impact front doors is a smart way to improve both moisture resistance and energy efficiency, since these doors are built with tighter seals and more durable materials designed to withstand harsh weather. This is especially valuable in regions prone to heavy storms or hurricanes.
Beyond upgrading the doors themselves, it is worth periodically checking the caulking and weatherstripping around all exterior openings. Even a well-built door can develop gaps as a home settles over the years. A quick visual inspection twice a year can help you catch these small issues before they turn into water intrusion problems.
Managing Water Flow in Your Yard
The way water moves through your landscaping has a direct impact on how much moisture ends up near your foundation and crawl space. Grading that slopes toward your house, rather than away from it, can funnel rainwater straight into vulnerable areas, so a simple check with a level or a walk-through after heavy rain can reveal problem spots. Ideally, the ground should slope away from your foundation at a rate of about six inches over the first ten feet.
Overgrown trees with invasive root systems can crack underground pipes or lift pavement, creating unexpected pathways for water to collect. Species like willows, silver maples, and poplars are especially notorious for aggressive root growth that seeks out moisture in sewer lines and irrigation systems. Even trees planted a good distance from your home can send roots far enough to cause damage, particularly in older properties with clay pipes.
In cases where a tree’s roots threaten your foundation or plumbing, consulting a tree removal company can prevent much larger problems from developing underground. A professional can assess whether root barriers, selective pruning, or full removal is the best solution based on the tree’s size, species, and proximity to structures. Removing or relocating problem trees is often more cost-effective than repairing the damage they eventually cause, especially when you factor in the price of excavation and pipe replacement. Addressing the issue early also protects nearby landscaping and hardscaping features from being disturbed during emergency repairs.
On the flip side, thoughtful landscaping can actually help manage water rather than contribute to the problem. Working with experienced garden designers can help you create swales, rain gardens, or strategic plant placement that directs water away from your home’s foundation. A properly graded swale, for instance, can carry several hundred gallons of runoff away from your house during a heavy storm, while a well-placed rain garden filled with native, water-loving plants can absorb excess moisture instead of letting it pool near your walls.
Consider the slope of your yard, soil composition, and the location of downspouts when planning these features, since even the best design won’t work if water has nowhere to go. Good landscaping design does double duty by improving curb appeal while also serving a practical drainage function.
-
Watch for trees with roots growing close to your foundation or pipes—species like willows, poplars, and silver maples are especially aggressive and should be planted at least 20 feet away
-
Consider permeable materials like gravel, permeable pavers, or porous concrete for walkways and patios to let water soak in rather than pool near your home
-
Use native plants and deep-rooted grasses that absorb excess water naturally, since they typically require less irrigation and handle local rainfall patterns better than non-native species
-
Grade garden beds and lawns so water flows away from the house, aiming for a slope of about 2% (roughly a 2-inch drop for every 10 feet)
-
Install a French drain or dry well in low-lying areas where water tends to collect after heavy rain
-
Keep gutters and downspouts extending at least 5-6 feet from the foundation to prevent runoff from pooling near the base of your home
Controlling Humidity Inside Your Living Space

Indoor humidity that stays too high for too long creates the perfect environment for mold, mildew, and musty odors, even if you never experience an actual leak. Bathrooms, kitchens, and laundry rooms are especially prone to trapped moisture if they lack proper ventilation. Keeping your HVAC system running efficiently plays a bigger role in humidity control than most homeowners realize, since a poorly functioning system struggles to pull excess moisture from the air. Scheduling routine ac repairs can keep your system dehumidifying properly, which protects both your comfort and your walls.
In addition to HVAC maintenance, using exhaust fans during and after showers or cooking can significantly cut down on trapped humidity. A simple hygrometer can help you monitor indoor humidity levels, which ideally should stay between 30 and 50 percent. If you notice condensation regularly forming on windows, it is a clear sign that humidity levels need attention.
-
Run bathroom and kitchen exhaust fans consistently
-
Keep indoor humidity between 30 and 50 percent
-
Schedule seasonal HVAC maintenance to support dehumidification
-
Watch for condensation on windows as an early warning sign
Protecting Your Water Quality and Pipes
Moisture damage is not only about water getting where it shouldn’t; it is also about water quality once it reaches your faucets. Hard water and sediment can accelerate corrosion in pipes and fixtures, making leaks more likely over time. Installing a water filter can reduce mineral buildup that stresses your plumbing system, while also improving the taste and safety of your household water supply. This is a small investment that pays off in both plumbing longevity and everyday convenience.
Regularly changing filter cartridges and checking connections for drips ensures the system itself does not become a moisture source. It is also worth testing your water periodically, especially if your home relies on a well, to catch changes in mineral content early. Healthier water often means a healthier plumbing system overall.
Repairing and Restoring Water-Damaged Areas
When moisture damage does happen, addressing it quickly and thoroughly prevents small problems from becoming major renovations. As a general rule, materials that have been wet for more than 24 to 48 hours are at high risk for mold growth, so the timeline for response matters as much as the repair itself. Water-stained drywall, warped flooring, and damaged cabinetry often need more than a surface fix, since moisture can linger inside materials long after the visible signs dry up.
Professionals typically use moisture meters to check humidity levels inside walls, subfloors, and framing before deciding whether a section can be dried in place or needs to be removed entirely. Drywall that has absorbed water, for example, often loses structural integrity and should be cut out at least 12 inches above the visible waterline. Baseboards, insulation, and cabinet backing are also common hiding spots for trapped moisture that a quick visual inspection can easily miss.
Reaching out to home remodeling services experienced in moisture remediation ensures the affected areas are properly dried, treated, and rebuilt rather than just cosmetically patched. These specialists often bring in industrial dehumidifiers and air movers to fully dry out a space over several days, then apply antimicrobial treatments before any new materials go in. This step is crucial for preventing hidden mold growth behind newly repaired walls, and it also gives homeowners documentation that can support insurance claims if the damage was significant.
Flooring is often one of the hardest-hit areas after water damage, especially in homes with natural wood floors. Warped boards, cupping, and discoloration are common signs that moisture has seeped beneath the surface, and once subflooring is compromised, simple refinishing usually isn’t enough. Choosing custom hardwood design during a repair or remodel allows you to select moisture-resistant finishes and installation methods suited to your specific climate and household needs.
Options like engineered hardwood with a moisture-resistant core, or species such as teak and white oak that naturally resist swelling, can make a real difference in humid climates or homes with frequent temperature swings. Talking with a flooring specialist about site-specific factors—such as proximity to bathrooms, kitchens, or exterior doors—can help determine which finish and plank width will hold up best over time.
This is also a good opportunity to add protective underlayments that can better withstand future spills or humidity swings. Vapor barrier underlayments, for example, help block ground moisture from rising into the wood, while foam or cork layers add a buffer against minor leaks and everyday spills. Investing in these details now can save significant repair costs down the road, since replacing an entire floor is far more expensive than reinforcing it during an initial restoration.
Building a Year-Round Maintenance Habit

Protecting your home from moisture is not a one-time project but an ongoing habit that shifts with the seasons. Spring and fall are ideal times for a full exterior walkthrough, checking your roof, gutters, foundation, and landscaping all at once. Summer heat can dry out caulking and seals, so a mid-year check of doors and windows is worthwhile, while winter calls for extra attention to ice dams and frozen pipes. Building a simple seasonal checklist keeps these tasks from slipping through the cracks.
Keeping records of past repairs and inspections also helps you spot patterns, such as a particular corner of the basement that floods every spring. This kind of documentation makes it easier to prioritize future improvements and budget for them in advance. A little consistency goes a long way toward keeping moisture problems rare rather than routine.
-
Inspect the roof and gutters each spring and fall
-
Check door and window seals mid-summer
-
Insulate exposed pipes before winter
-
Keep a written log of past moisture issues and repairs
Protecting your home from moisture damage comes down to consistent attention across every part of your property, from the roof down to the foundation and everything in between. Small, regular checks are far less costly than emergency repairs after water has already caused damage. Start with the areas most relevant to your climate and home’s age, then build outward into a full seasonal routine. Taking these steps now will help ensure your home stays dry, healthy, and structurally sound for years to come.
